Home Server Build Part 1: Hardware
The Plan
I have the following goals for this home server.
- Self host apps to replace apps I pay for or want to keep data private. (Google Drive/Photos, Github)
- Provide a VPN to my home network when needed.
- Provide a more powerful linux development box that I can remote into.
- Learn docker / networking / server security
- Do all of this securely without opening ports.
These goals are fairly common in the self-hosted community (shout out to r/selfhosted and r/datahoarders). Being a software engineer this sort of thing is right up my alley. I’m not getting too serious with the amount of storage or processing power here, this is just meant to be a step up from the raspberry pi I’ve maxed the memory out on from running a unifi controller.
The Parts
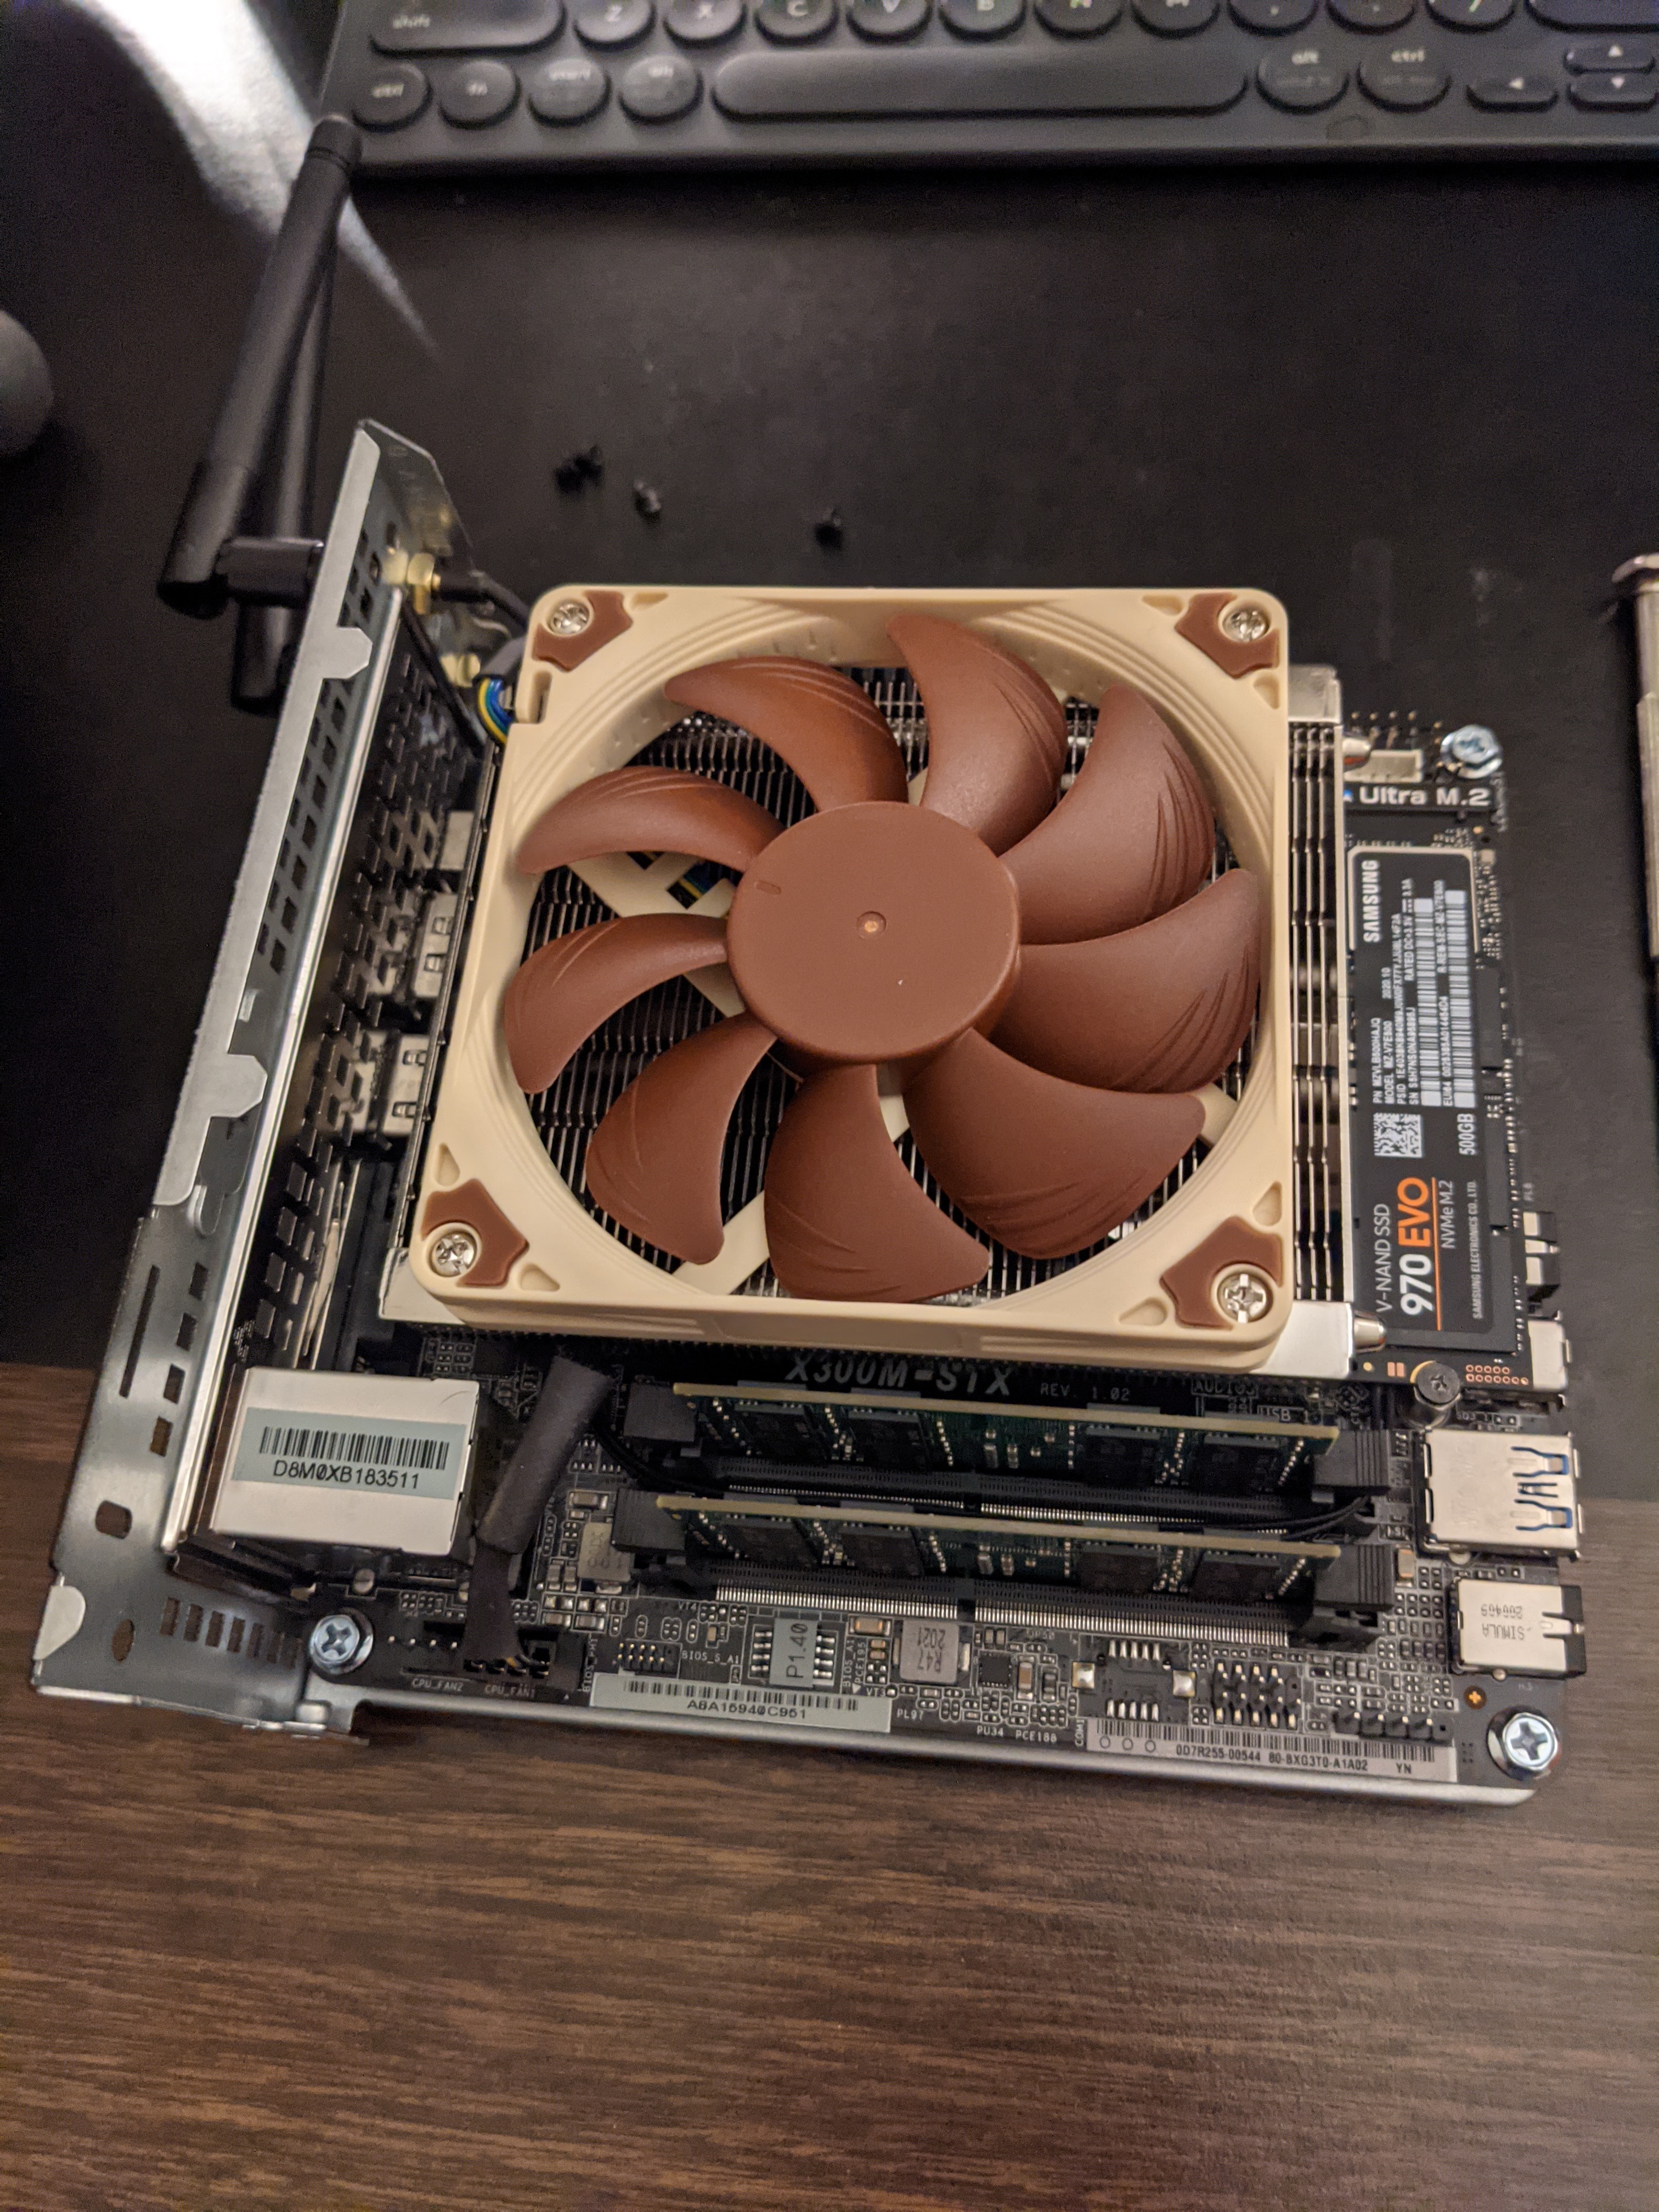
The chassis (and mobo) for this build is the very tiny ASRock Deskmini. It is the latest model that supports the latest gen Ryzen APU’s. It has room for 2 NVME’s if you don’t want wifi, and two mounting slots for 2.5 in hard drive or SSD’s. I wanted this build to be a little fun and unique, so I went with the tiniest board I could find and still have enough space for significant storage.
Based on reviews and feedback, I saw the stock cooler wasn’t great so I purchased a high quality Noctua fan. I can confirm it is nearly silent now.
The processor was actually bought off of aliexpress. I took a huge chance on this and it ended up working out fine. I believe this CPU is only sold in assembled units right now so I couldn’t get it yet in the states. In terms of processing power it seems to be equivalent to the Rzyen 5 3600.
- Chassis: ASRock Deskmini X300W
- Processor: AMD Ryzen 5 Pro 4650G
- Cooling: Noctua NH-L9a-AM4
- Memory: Crucial 2 x 8gb 3200 SODIMM
- OS / App Storage: Samsung 970 EVO NVME M.2 500gb
- General Storage: 2 x Seagate 2Tb 5400 rpm HDD
- Backup Storage: WD Elements 4TB USB 3.0
Total Price: $713
The Build
You would think when using a barebones chassis like the deskmini that the build would be pretty straightforward, but there are a few things that we found challenging. We first put on the CPU, and then saw that we needed to install the cooler backwards to put on the custom backplate. This meant taking the board off, lining up the brackets of the backplate, board, and cooler.
After putting the board back on we had to take it off again when installing the hard drives. The mounting holes were in different locations for each of the drives and one of them was on the backside between the board and mounting plate. The included SATA cables were much too long but we folded them the best we could.
The wifi module (first M.2 slot) actually took the longest to install. That screw was a real pain for some reason. The NVME M.2 hard drive installed with little effort.
We put in the RAM and it booted to bios just fine!